
Adding a WordPress Gallery
When adding a WordPress gallery to a page or post after upgrading to WordPress 3.5.1 or newer – you might get a bit of a shock!
But don’t worry, the process is pretty similar – it’s just the interface that’s different.
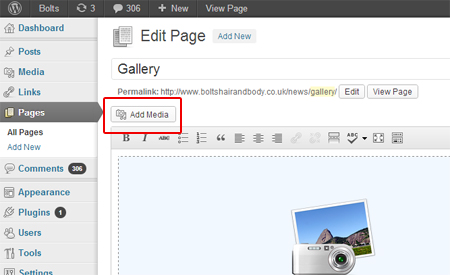
Rather than click on the little camera icon above your content area, now click on the “Add media” button.
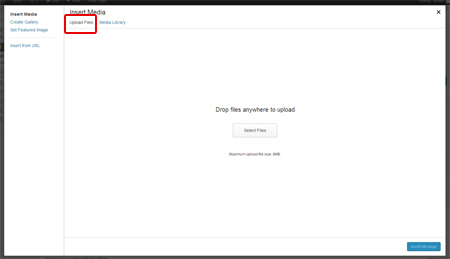
This is where the real changes kick in – you might be used to a small box appearing in the middle of your screen, with little tiny thumbnails of each picture. But now you get a full screen box appear, with a big grid of your images (if you’ve got any uploaded). Click on “Upload Files” – highlighted below in red – to see a “Select Files” button so you can upload your pictures.
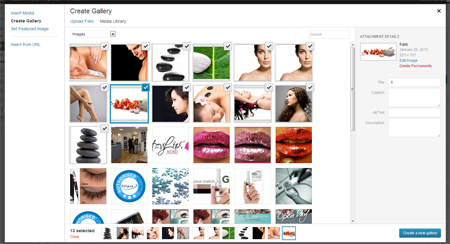
Once you’ve uploaded what you need to, click on “Create Gallery” from the left hand side. Click on the photos you want in your gallery and you’ll see a tick appear on them. Click on them again if you want to remove them. Click on any one to get boxes on the right where you can enter alt tags etc. Once you’re done, click on “Create a new gallery”.
On the the following screen you can click and drag your images into a different order, and select how many coloumns your gallery should appear in (this will depend on the width of your page). If you’re using a lightbox plugin, choose to link to the “Media File” rather than the attachment page. If you’re using captions you can type them underneath each photo.
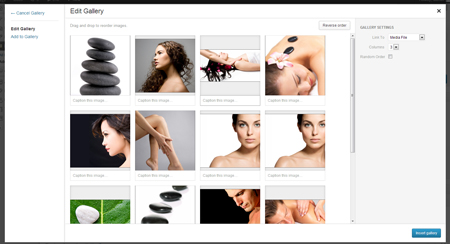
Then click the blue “Insert gallery” button and you’re done!
The Knowledge Base
Our knowledge base is split into categories, with an introdution to various differnt aspects of that category, followed by current topical articles which we constantly add.