
Using menus in WordPress
As WordPress became used more and more for websites rather than just for blogs, the need to be able to mix categories and pages into the same menu became more pressing.
So a few versions ago, WordPress introduced a great way to handle menus – provided your developer sets your site up to use them. Thanks goes to our client Mike Burns Photography for letting me use his site as a screenshot-example!
HOW TO UPDATE YOUR MENU IN WORDPRESS:
1. From the left hand admin menu, navigate to Appearance > Menus.
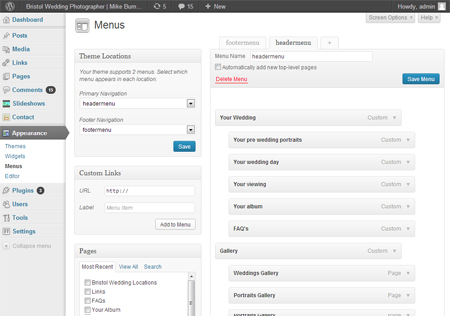
2. From the “Theme Locations” box, check which menu you’re updating, if your site is set up to use more than 1 custom menu.
3. The rest of the boxes on the left then let you choose the content that you’re adding to your menu.
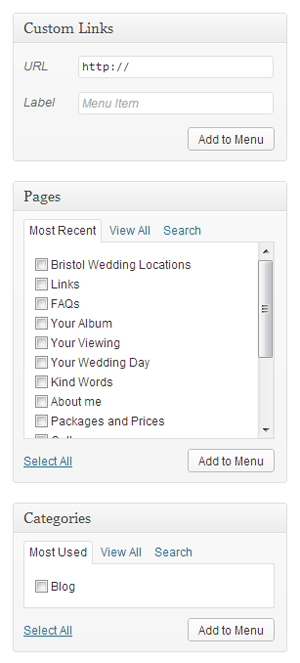
Custom Links are links which not pages or categories on your site. So for example, if you want to link to your company’s other website, or you want a link directly from your menu to your Facebook page. I’d say use this feature wisely because people don’t expect to click on something in a menu and jump to another website. I use it when a WordPress site is bolted onto the side of a bigger website so I want visitors to seamlessly move around 2 systems which look the same and are intertwined. Fill in the URL (inc. http:// etc.) and give the link a label. Then clcik “Add to menu” to see it appear at the bottom of the list on the right.
Pages are all of the pages you’ve added to your WordPress site – the tabs just help you find them. Tick the boxes for the pages you now want to add to your menu and click “Add to menu”.
Categories are all the categories you’ve set up for your blog on WordPress, and again the tabs just help you find them. Tick the boxes for the categories you want to add to your menu and – you guessed it – click “Add to menu”.
4. Now, with your new pages/categories/URLs added to the list of pages that are in your menu, you can drag them into position.When you mouse over them you’ll see your cursor change meaning if you click the left hand button on your mouse and move your mouse, you’ll be able to move the box with you and drop it where you want it in the list. Pages at the top are earliest in the menu (typically, unless yours is set up differently).
Dragging something ever so slightly to the right indents it, meaning it’s a sub-page. So if you’ve got drop down menus on your site or the facility for your custom menu to accommodate sub-menus, this is how you put things there.
5. To change how your menu item is labelled in the menu – because maybe the name of the page is too long so you want to call it something else just in the menu – click on the arrow on the right hand end of the item’s box to display more options. There are advanced options here, which you can make viewable from changing the “Screen Options” set at the very top of the page, but if you need those, your web developer will tell you about them. They’re for applying particular CSS classes (should you want some menu options to look different) etc.
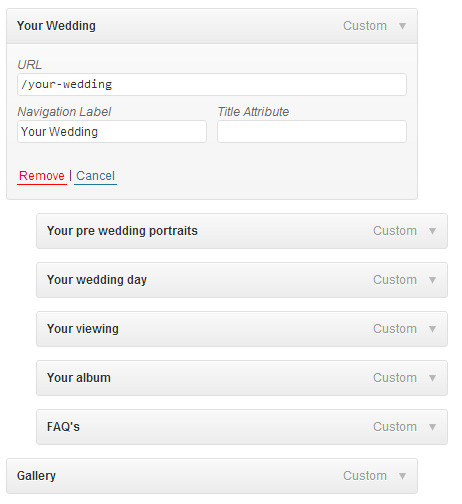
If you change your mind about having something in your menu, click on the red “remove” link – it won’t remove the page / category from your site, it’ll just remove the link to it from the menu. If you open this box, change something, but change your mind and you don’t want to save anything, clicking cancel just reverts back to how it was when you opened the box.
6. Remember to save your changes!!! I’m very guilty, for some reason, on this page in particular, of forgetting to save my updates. So always click the blue “Save Menu” button at the top of the page.
The Knowledge Base
Our knowledge base is split into categories, with an introdution to various differnt aspects of that category, followed by current topical articles which we constantly add.